
Sub-Total: $0.00
How to Anchor Outdoor Holiday Lights: 2026 Guide
| Blog
Table of Contents
- What You’ll Need Before You Start
- How to Anchor Outdoor Holiday Lights to Gutters and Rooflines
- The Best Outdoor Light Clips for Brick and Siding
- How to Secure Light Sculptures to the Ground
- Wind-Load and Weather-Proofing Your Display
- Electrical Load, GFCI Outlets, and Safe Power
- How to Repair Chipped Powder Coating
- Frequently Asked Questions
Last Updated: September 27, 2026
What You’ll Need Before You Start
Anchoring outdoor holiday lights starts with the right plan, not the right clip. Do it the other way around.
Here’s what to gather before you climb a ladder:
- Outdoor-rated extension cords and a UL Solutions guide to outdoor electrical safety reference for cord ratings
- Gutter clips, shingle tabs, and siding hooks matched to your surface
- Light stakes for the yard and zip ties for tension control
- A GFCI outlet or portable GFCI adapter
- Work gloves, a ladder, and a helper
Pro Tip
Lay your full layout on the driveway first. It exposes gaps, dead strands, and short runs before you’re 10 feet up a ladder in the cold.
Lay your full layout on the driveway first. It exposes gaps, dead strands, and short runs before you’re 10 feet up a ladder in the cold.
How to Anchor Outdoor Holiday Lights to Gutters and Rooflines
The gutter and roofline carry the most visible part of your display, so they need the most secure anchoring. Here’s how to anchor outdoor holiday lights along that edge without damaging the fascia board.
Gutter Clips and Shingle Tabs
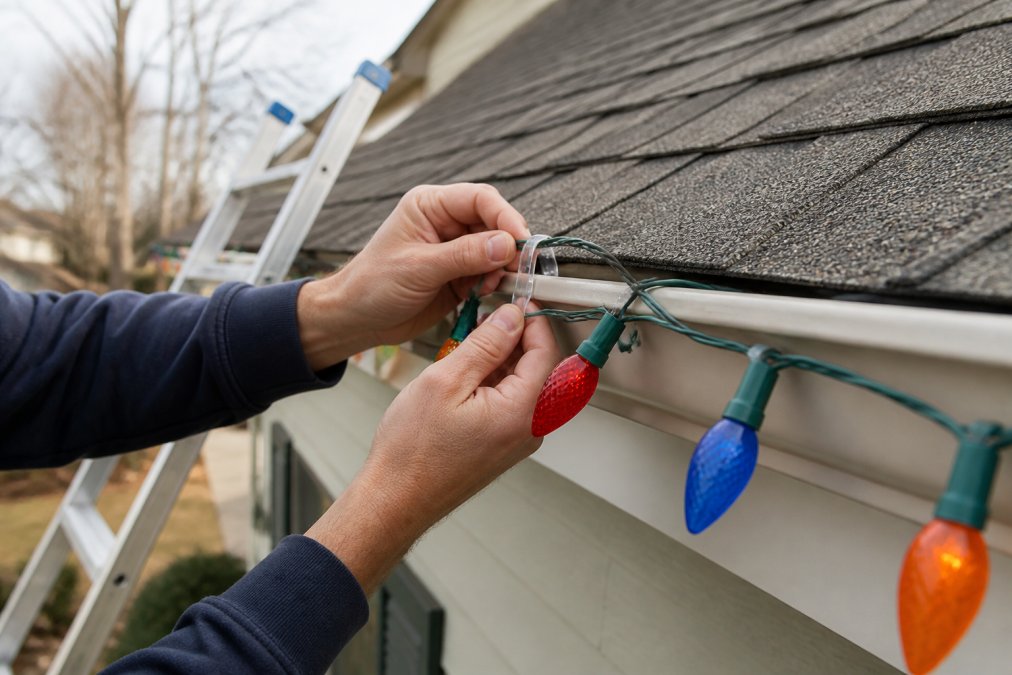
Gutter clips snap onto the lip of the gutter and hold a strand in place. Shingle tabs slide under the edge of a shingle and lock onto the roofline. Both keep lights off the roof surface.
Managing Tension and Spacing
Spacing and tension decide whether your display looks professional or sloppy. Keep clips evenly spaced and leave slight slack between them. Tight strands pull loose in wind. Loose strands sag and look uneven.
- Space clips evenly along the run
- Leave a small loop between anchor points
- Add a zip tie at corners for extra hold
The Best Outdoor Light Clips for Brick and Siding
The best outdoor light clips for brick and siding grip without drilling. Brick needs clips with a wide, gripping back. Vinyl siding needs hooks that slide under the panel edge.
How Each Clip Actually Grips
- Adhesive clips rely on a pressure-sensitive foam or acrylic pad. They hold best on smooth, clean, non-porous surfaces, painted trim, metal flashing, brick with a sealed face. They fail on rough brick, dusty mortar, and cold vinyl because the adhesive can’t wet out the surface.
- Vinyl siding hooks are a bent metal or plastic tab that slides under the bottom lip of a panel and hooks over it. The panel’s own weight and overlap hold the hook. No adhesive, no residue, and they can be repositioned all season.
- Gutter clips snap over the outer lip of the gutter and pinch the strand. They carry the most weight of the three because the gutter lip is a rigid anchor.
- Shingle tabs slide under the edge of a shingle course. They work only where a shingle edge is exposed, never force one under a sealed tab.
Matching Clip to Surface
| Clip Type | Best Surface | Typical Hold | Removal |
|---|---|---|---|
| Adhesive clips | Brick, metal, painted trim | Light strands | Peel off; may leave residue |
| Vinyl siding hooks | Vinyl siding | Medium strands | Lift out; no residue |
| Gutter clips | Gutter lip | Heavy strands | Unsnap |
| Shingle tabs | Exposed shingle edge | Medium strands | Slide out |
A common pattern is to overbuy adhesive clips, then discover they won’t stick to a cold, textured brick face in December. Buy a small test pack first and stick one clip to each surface type on your home before committing to a full run.
Removing Adhesive Residue Without Damaging the Finish
- Vinyl siding: Warm the clip with a hair dryer on low for 20-30 seconds, then peel slowly at a low angle. Any residue lifts with a dab of mineral spirits on a microfiber cloth, followed by a rinse. Never scrape vinyl with a metal blade, it gouges permanently.
- Brick: Brick is porous, so adhesive grabs the face and the mortar lines. Peel warm, then work residue out of the texture with a soft nylon brush and a mild dish-soap solution. Avoid acidic cleaners, which etch mortar.
- Painted trim: Warm and peel. If paint lifts with the clip, stop, you’re pulling on a weak bond. Touch up with matching exterior paint rather than fighting the adhesive.
- Metal and glass: Isopropyl alcohol on a cloth removes most residue without dulling the finish.
Pro Tip
Test any solvent on an inconspicuous spot first. Mineral spirits are safe on most exterior finishes but can dull some factory-applied clear coats.
Test any solvent on an inconspicuous spot first. Mineral spirits are safe on most exterior finishes but can dull some factory-applied clear coats.
Load and Spacing Rules of Thumb
- Space clips every 12-18 inches on a straight run; tighten to 6-9 inches on exposed corners and gable ends where wind load concentrates.
- Support the strand between clips with a small loop of slack so the wire, not the clip, carries the tension.
- For C9 or C7 strands, add an extra clip at every transition between a horizontal run and a vertical drop.
Match the clip to the surface, test before you commit, and plan the removal before you install. That’s what separates a display that comes down clean in January from one that leaves a trail of residue and chipped paint.
How to Secure Light Sculptures to the Ground
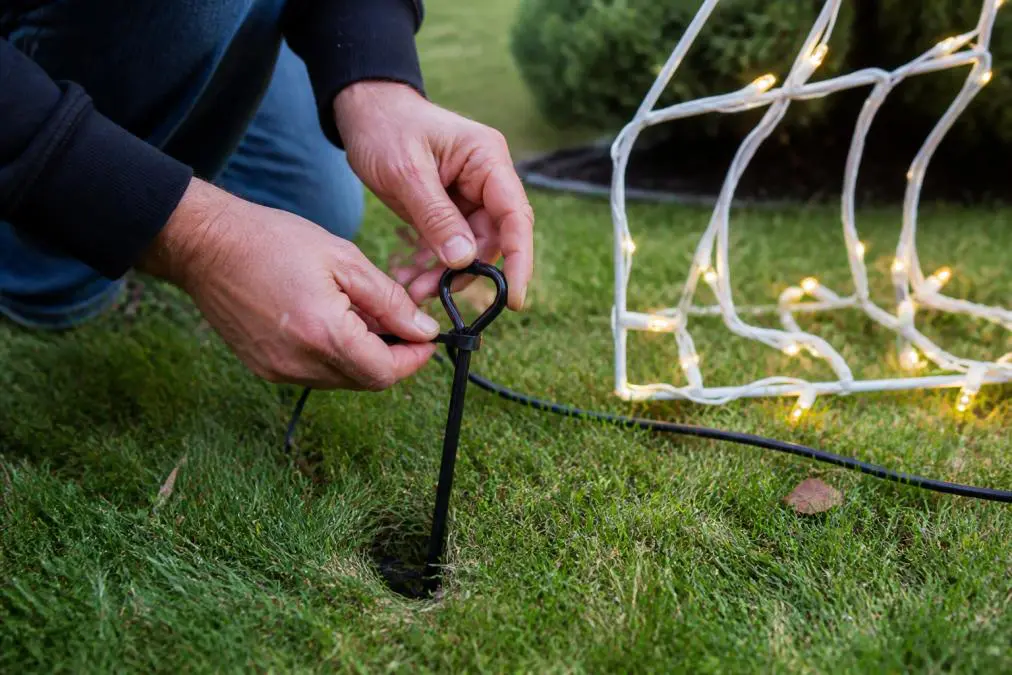
Ground sculptures need anchor points that survive wind and rain. Push light stakes into the soil at each corner of the sculpture. For heavier pieces, drive a stake deeper and tie the frame to it with zip ties.
Why Wind, Not Weight, Is the Real Problem
A light sculpture is mostly air. Wind-load, the force moving air puts on the frame, grows roughly with the square of wind speed, so a 20 mph gust pushes about four times as hard as a 10 mph breeze. A tall, light frame catches that force like a sail and levers it against the stakes. That’s why a sculpture that feels solid on a calm day can flatten in the first storm.
Matching Anchor to Soil and Frame
- Loose or sandy soil: Standard 6-inch stakes pull out. Use longer auger-style ground anchors (8-12 inches) and drive them at a 15-20 degree angle away from the frame so the load pulls against undisturbed soil.
- Firm or clay soil: Straight stakes hold well, but water can pool and soften the hole. Add a small gravel collar around each stake to improve drainage.
- Rocky ground: Skip stakes and use weighted bases, sandbags or water-filled bases rated for the frame’s footprint.
- Tall frames (over 4 feet): Combine two anchors per corner, one at the base and one guy-line to a stake 2-3 feet out, to resist tipping.
Step-by-Step Anchoring
- Set the sculpture in its final position and mark each corner.
- Drive stakes at an angle, not straight down, so wind load pulls against soil rather than lifting the stake.
- Tie the frame to each stake with UV-rated zip ties, leaving a little slack so the frame can flex without snapping.
- Add a sandbag or ground anchor at the base of any frame taller than 4 feet.
- Re-check tension after the first rain, when soil settles and stakes loosen.
Troubleshooting: When Anchors Fail
- Stakes pop out overnight: The soil is too loose or the stake is too short. Switch to auger anchors and angle them further.
- Frame leans after wind: Guy lines are missing or too slack. Add a line to the windward side.
- Zip ties snap: You used indoor ties or overtightened them. Switch to UV-rated ties and leave a small loop.
- Sculpture walks across the yard: The base is too light for the sail area. Add weight to the base, not just the corners.
Watch Out
A single unsecured corner can let a gust rotate the whole sculpture and pull every other anchor loose. Anchor all corners, not just the visible ones.
A single unsecured corner can let a gust rotate the whole sculpture and pull every other anchor loose. Anchor all corners, not just the visible ones.
Skip this step and a single gust can flatten a display you spent hours building. Anchor for the worst wind of the season, not the calm day you install.
Wind-Load and Weather-Proofing Your Display
Wind, not rain, destroys most displays. Wind-load is the force moving air puts on a strand or sculpture, and it grows fast as wind speed rises. A loose strand catches wind like a sail.
- Tie down loose strand ends
- Add extra anchor points on exposed corners
- Use outdoor-rated clips and cords only
- Re-check tension after heavy wind
Watch Out
A single unsecured strand end whipping in the wind can pull an entire run loose overnight. Anchor both ends of every strand.
A single unsecured strand end whipping in the wind can pull an entire run loose overnight. Anchor both ends of every strand.
Electrical Load, GFCI Outlets, and Safe Power
Electrical load is the total power your display draws, measured in watts. Add up the wattage on every strand and compare it to your circuit capacity. Overloading a circuit trips breakers or blows fuses.
- Add up total wattage before you plug in
- Keep the load under your circuit’s limit
- Use a GFCI outlet or portable GFCI adapter
- Check the Consumer Product Safety Commission guidance on holiday lighting for seasonal safety tips
How to Repair Chipped Powder Coating
Powder coating protects metal frames from rust, so a chip needs attention fast. Clean the chipped area, sand the edges smooth, and wipe it dry. Then apply a matching touch-up paint in thin coats.
- Clean and dry the chipped spot
- Sand rough edges lightly
- Apply thin coats, letting each dry
- Seal with a clear topcoat
Key Takeaway
The displays that last for years share one habit: they get checked and touched up at the end of every season, not the start of the next one.
The displays that last for years share one habit: they get checked and touched up at the end of every season, not the start of the next one.
Frequently Asked Questions
What is the best way to anchor outdoor lights to brick?
For brick surfaces, use adhesive clips designed for masonry or brick clips that grip mortar lines without drilling. Clean the brick first with a damp cloth to remove dust, then press the adhesive clip firmly and wait 24 hours before hanging lights. Avoid nails or screws, which can crack brick and leave permanent holes. In cold weather, warm the adhesive with a hair dryer for better bonding.
How do you keep outdoor light strands from sagging?
Sagging happens when strands are hung with too much slack between anchor points. Space clips every 12 to 18 inches along the roofline or gutter, and pull each section gently taut before securing. For long runs, use zip ties at anchor points to hold tension. If a strand still droops, add an extra clip at the midpoint. Proper spacing and tension keep the roofline looking clean and professional.
Can you use adhesive clips for heavy-duty holiday displays?
Adhesive clips work well for lightweight strands and smaller decorations, but heavy light sculptures and large animated pieces need mechanical anchors. Use ground stakes, vinyl siding hooks, or brick clips that physically grip the surface. For anything over a few pounds, combine adhesive clips with zip ties or mounting hardware. Always check the clip’s weight rating before hanging heavy items.
What are the safest ways to attach lights to a roofline?
Use gutter clips or shingle tabs that slide under shingles without piercing them. Never staple or nail through shingles, as this voids roofing warranties and creates leak points. Plug all outdoor lights into a GFCI outlet to protect against electrical shock. Keep extension cords outdoor-rated and check wattage so you do not exceed circuit capacity. Inspect strands for damage before hanging.
