
Sub-Total: $0.00
How to Prevent Outdoor Light Corrosion
| Blog
Table of Contents
- Understanding Outdoor Light Corrosion: Causes and Environmental Factors
- Step 1: Choose Corrosion-Resistant Materials and Finishes
- Step 2: Apply the Best Clear Coat for Outdoor Metal Lights
- Step 3: Weatherproof Your Outdoor Electrical Connections
- Step 4: Establish a Preventative Maintenance Routine
- Step 5: How to Repair Chipped Powder Coating
- Troubleshooting Stuck Bulbs and Corroded Connections
- When to Replace vs. Repair: DIY and Professional Thresholds
- Frequently Asked Questions
Last Updated: October 4, 2026
Understanding Outdoor Light Corrosion: Causes and Environmental Factors
Outdoor light corrosion happens when metal fixtures are exposed to moisture, salt, and oxygen over time. This creates a chemical reaction that eats away at the fixture’s surface and internal components. Understanding what causes corrosion is the first step toward protecting your investment.
Salt Air and Humidity’s Impact
Salt air and humidity are the harshest enemies of outdoor lighting. If you live near the coast or in areas with road salt, your fixtures face constant attack from an electrolyte bridge that forms between metal surfaces and moisture. The combination of salt air and high humidity can degrade unprotected fixtures in a single season.
Moisture Ingress and Oxidation
Moisture seeps inside through tiny gaps in connections and seals, triggering oxidation of metal components. The visible rust on the outside is just a symptom; the real damage happens inside the fixture housing, where wiring harnesses corrode and lamp sockets deteriorate. By the time you notice exterior corrosion, internal damage may already be extensive.
Step 1: Choose Corrosion-Resistant Materials and Finishes
Your first defense against outdoor light corrosion starts with material selection. Not all metals are created equal, and each requires different maintenance approaches.
Understanding Corrosion Classes and Material Ratings
The American Society for Testing and Materials (ASTM) classifies corrosion environments into five categories: C1 (very low), C2 (low), C3 (medium), C4 (high), and C5 (very high).
Stainless Steel (304 and 316 grades): Stainless steel resists corrosion naturally due to its chromium content, which forms a self-healing oxide layer. Grade 304 works well in C3 environments; Grade 316 is necessary for C4 and C5 coastal zones.
Aluminum (6061-T6 and 5052-H32 alloys): Aluminum requires protective finishing to prevent pitting corrosion in salt environments. Anodized aluminum (Type II or Type III) is suitable for C3 environments; marine-grade anodizing works for C4.
Brass and Copper: These metals develop a protective patina (green or brown layer) that actually slows further corrosion. They remain structurally sound even when heavily patinated.
Cast Iron and Untreated Steel: These materials rust quickly without protection and are unsuitable for outdoor use unless heavily coated. If you inherit cast iron fixtures, they require annual touch-up painting and are not recommended for coastal or high-humidity zones.
Finish Systems and Their Maintenance Demands
The finish matters as much as the base material. Different coatings require different care schedules:
Powder Coating: A factory-applied thermosetting finish ideal for C3 and C4 environments. Maintenance involves annual fresh-water rinsing and immediate repair of chips or scratches. UV exposure can cause chalking (white powder residue) after 5-7 years, indicating the coating is thinning and should be monitored.
Hot-Dip Galvanizing: A zinc coating that performs well in C3 and moderate C4 environments. The zinc layer sacrifices itself to protect the underlying steel. Maintenance is minimal, annual rinsing suffices. White rust (zinc oxide) is normal and protective; do not remove it aggressively.
Anodizing (Aluminum): An electrochemical process that thickens the natural oxide layer. Type II suits C3 environments; Type III is required for C4 coastal zones. Maintenance involves gentle rinsing and avoiding acidic cleaners. Do not use vinegar or citrus-based cleaners.
Clear Coat or Lacquer: Applied over bare or polished metal to preserve appearance. This is the weakest finish for outdoor use and requires reapplication every 2-3 years. It is best reserved for sheltered locations or decorative fixtures in low-corrosion zones (C1-C2).
Material Selection by Environment
For coastal or high-salt zones (C4-C5): Choose stainless steel 316 or anodized aluminum (Type III). Brass and copper are also excellent but more expensive. Avoid untreated steel and cast iron entirely.
For moderate humidity or road-salt exposure (C3): Stainless steel 304, powder-coated aluminum, or hot-dip galvanized steel are cost-effective. Brass and copper work well if patina is acceptable.
For low-corrosion zones (C1-C2): Powder-coated steel, anodized aluminum, or even painted cast iron can perform adequately with annual maintenance.
Step 2: Apply the Best Clear Coat for Outdoor Metal Lights
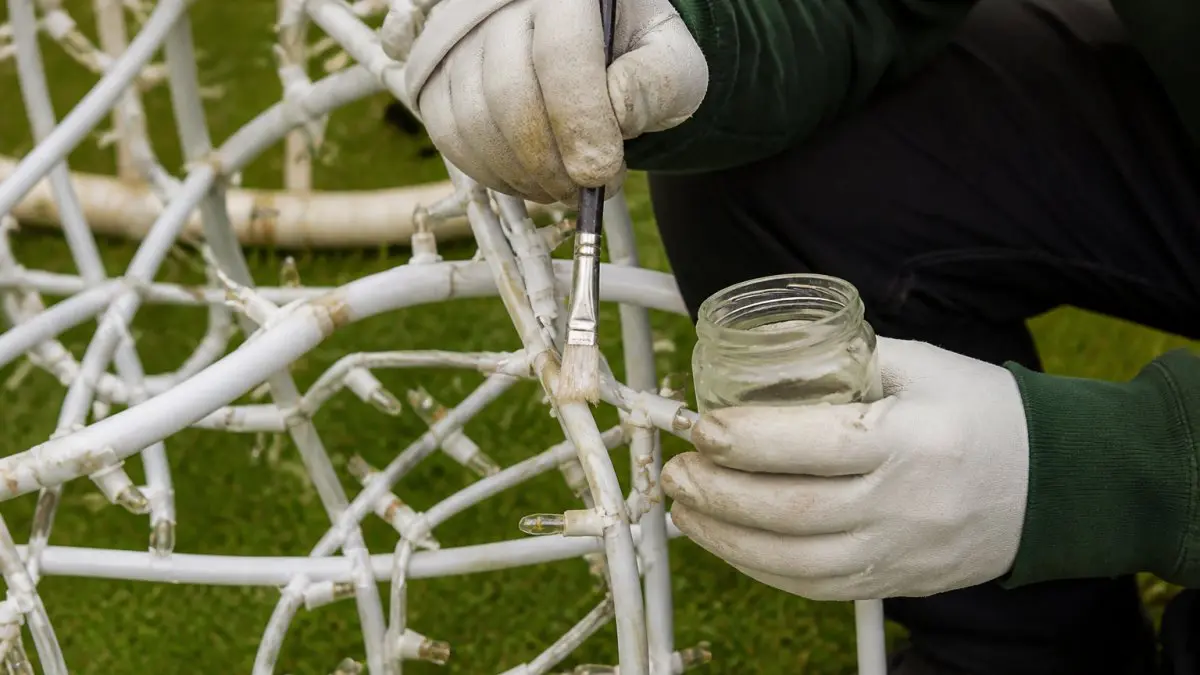
A clear coat provides an invisible shield that prevents moisture from reaching the metal underneath. This is essential for how to prevent outdoor light corrosion, especially in harsh climates. Choose a UV-resistant clear coat designed for outdoor use. Apply in thin, even layers and reapply every 2-3 years or when the coating wears thin.
Step 3: Weatherproof Your Outdoor Electrical Connections
Electrical connections are where corrosion does the most damage. Water and salt corrode crimped connections, creating resistance that generates heat and causes failures. Protecting connections requires physical moisture barriers, dielectric protection, and regular inspection.
Using Dielectric Grease and Protective Barriers
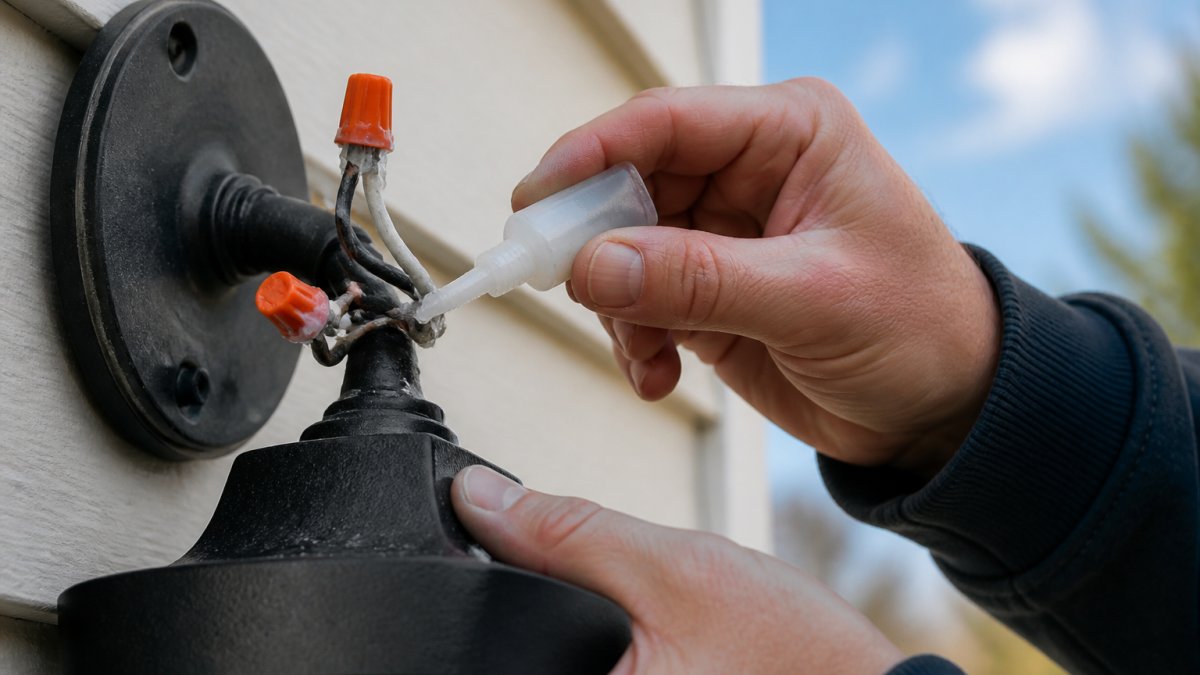
Dielectric grease is your first line of defense. This non-conductive compound prevents moisture from reaching metal terminals while allowing electrical current to flow freely.
Apply dielectric grease to bulb sockets, wire connectors, plug connections, and any exposed terminals. Work it into connections thoroughly to fill gaps. A thin layer is sufficient; excess grease attracts dust. Reapply annually or whenever corrosion deposits form.
Sealing Gaskets and Moisture Barriers at Fixture Bases
Moisture ingress at the mounting base is the most common failure point. Water seeps around the fixture mounting bracket and travels into the fixture housing, corroding internal wiring.
Gasket Inspection and Replacement:
Gaskets are rubber or silicone seals between the fixture housing and mounting bracket. Check annually for cracks, hardening, or compression loss. Replace damaged gaskets immediately. Preventative replacement every 5-7 years is cost-effective compared to internal corrosion repair.
Silicone Sealant Application:
Apply 100% silicone caulk around the perimeter where the fixture mounting bracket meets the wall or pole. Clean the surface, apply a continuous bead, smooth with a wet finger, and allow 24-48 hours to cure. Inspect annually for cracks and reapply every 3-5 years.
Protecting Wiring Harnesses and Cable Entry Points
Wires passing through the fixture housing are another moisture entry point. For removable cables, use a cable gland (threaded fitting) to create a watertight seal. For permanently installed wiring, apply silicone sealant around wire exits. For hanging fixtures, create a drip loop, a downward-facing loop in the cable just below the fixture, to force water to drip off.
Protecting Sensitive Components: LED Drivers and Smart Sensors
Modern outdoor fixtures often include LED drivers and smart sensors, which are highly sensitive to moisture. For professional protection, apply conformal coating to circuit boards. For DIY protection, place silica gel desiccant packs inside sealed cavities and replace annually. Do not seal ventilation holes; they prevent condensation.
Connection Inspection Checklist
Perform this inspection quarterly: Look for corrosion deposits on terminals, check that connectors are hand-tight, inspect sealant for cracks, verify gaskets are intact, confirm dielectric grease is present, and check for water inside the fixture. Early detection prevents costly repairs.
Step 4: Establish a Preventative Maintenance Routine
Preventative maintenance is far easier than repairs. A simple routine keeps your outdoor light corrosion under control and extends fixture life dramatically.
Seasonal Cleaning and Fresh Water Rinsing
Clean your fixtures every season, especially after winter. Use fresh water to rinse away salt deposits and debris.
Here’s your cleaning routine:
- Inspect the fixture for visible corrosion or damage
- Rinse with fresh water from a hose (low pressure)
- Dry thoroughly with a soft cloth
- Check all connections for tightness
- Apply dielectric grease to any exposed terminals
Fresh water rinsing removes salt residue that accelerates corrosion. This single step makes a huge difference in fixture longevity.
Inspecting Wiring and Lamp Sockets
Monthly inspections catch problems early. Look for these warning signs:
- Green or white corrosion deposits on metal surfaces
- Loose or corroded bulb sockets
- Discoloration around connections
- Any visible rust or pitting on the fixture
Lamp sockets corrode from the inside out. If a bulb feels loose or difficult to install, the socket is likely corroded. Replace corroded sockets before they fail completely.
Check wiring for damage or exposed copper. Even small cuts in insulation allow moisture to reach the conductor, creating corrosion and electrical hazards.
Step 5: How to Repair Chipped Powder Coating
Chips in powder coating expose bare metal underneath. These small breaches become corrosion entry points that spread rapidly.
Repair chipped powder coating as soon as you notice it:
- Clean the damaged area with a wire brush or fine sandpaper
- Remove all loose coating and rust
- Wipe clean with a dry cloth
- Apply touch-up powder coat or rust-preventive paint designed for metal
- Allow proper drying time before exposing to weather
For larger damage areas, professional recoating may be more effective than patch repairs.
Troubleshooting Stuck Bulbs and Corroded Connections
Stuck bulbs are usually a sign of corrosion inside the socket. The metal contacts have oxidized and seized onto the bulb’s base.
Never force a stuck bulb. Forcing it can break the bulb or damage the socket permanently.
Instead, try these steps:
- Turn off power to the fixture
- Let the fixture cool completely
- Apply a small amount of penetrating oil around the bulb base
- Wait 15-20 minutes for the oil to work
- Gently twist the bulb back and forth with steady pressure
- If it still won’t budge, leave it overnight and try again
Once you remove the bulb, inspect the socket. If corrosion is visible, clean it with a small wire brush or fine steel wool. Apply dielectric grease to the socket contacts before installing a new bulb.
For corroded connections, disconnect the affected wire. Clean both the terminal and the wire end with fine sandpaper or a wire brush. Reconnect and apply dielectric grease to the joint.
When to Replace vs. Repair: DIY and Professional Thresholds
Some corrosion damage is worth fixing yourself. Other problems require professional help.
DIY repairs work best for:
- Surface rust or corrosion on the fixture exterior
- Stuck bulbs or loose connections
- Chipped powder coating in small areas
- Routine cleaning and preventative maintenance
Call a professional for:
- Corrosion inside the fixture housing that affects wiring
- Damaged LED drivers or electrical components
- Extensive rust or pitting that compromises structural integrity
- Any repair involving electrical rewiring or component replacement
The cost of professional restoration is often less than replacing the entire fixture. If your display has sentimental value or you’ve invested in quality pieces, professional restoration is worth considering.
For newer fixtures still under warranty, contact the manufacturer before attempting repairs. Some damage may be covered, and improper repair can void warranty coverage.
Outdoor light corrosion is preventable with the right approach. Regular maintenance, proper weatherproofing, and quick repairs keep your display beautiful and functional for decades. Our handmade, powder-coated light sculptures are built to withstand harsh environments, but they still benefit from the care outlined in this guide. Start with material selection, add weatherproofing to electrical connections, and commit to seasonal maintenance. Your investment in quality outdoor lighting deserves the protection that prevents corrosion from taking hold.
Frequently Asked Questions
What is the best way to protect outdoor light fixtures from rust?
Protect outdoor light fixtures by combining three strategies: choose corrosion-resistant materials like powder-coated steel or aluminum, apply a clear protective coating annually, and weatherproof electrical connections with dielectric grease and silicone sealant. Establish a maintenance schedule that includes seasonal rinsing with fresh water and monthly inspections of wiring and lamp sockets. These steps work together to prevent how to prevent outdoor light corrosion before it starts.
Does clear coat prevent corrosion on outdoor lights?
Yes, the best clear coat for outdoor metal lights creates a protective barrier that slows oxidation and salt air corrosion significantly. Quality exterior-grade clear coats designed for metal surfaces form a weatherproofing seal that prevents moisture ingress into the fixture housing. Reapply clear coat every 12-18 months, especially in coastal or humid environments where environmental stress factors are higher.
How often should I clean outdoor holiday lights to prevent damage?
Clean outdoor lights at least twice yearly: once before the holiday season and once after. In coastal or high-humidity areas, increase to quarterly cleaning. Use fresh water rinsing to remove salt deposits and oxidation buildup. Inspect electrical connections, lamp sockets, and the fixture housing during each cleaning. This preventative maintenance routine catches early corrosion before it damages wiring harnesses or LED drivers.
Are powder-coated lights resistant to corrosion?
Powder-coated lights offer excellent corrosion resistance compared to bare metal, but they still require protection. Powder coating creates a durable protective coating that resists salt air and humidity, yet chipped or damaged areas expose underlying metal to galvanic corrosion. Inspect powder-coated fixtures regularly for chips, repair them promptly, and apply a clear coat topcoat for enhanced protection in harsh environments.
